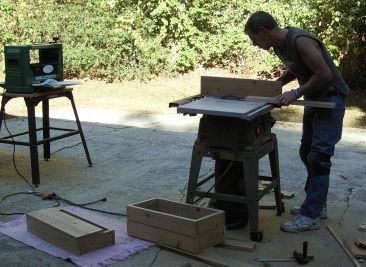
Even though our goal was to build "distressed" trunks, we're both perfectionists at heart, which meant starting by planing the boards we would be using. In this case, because we were giving them as gifts, it was the right call. Of course, it's really up to you. If you want to achieve a truly rustic look, you might consider only a light sanding.
Here, the bases of the trunks have been assembled. A small hand plane
and palm sander were used to even out the surfaces. We added trim, but you don't have to. If you do decide to include trim, it's easier if you do it before attaching the lid or any hardware.
To ensure that the lids were even and completely flat, we clamped the boards together to reduce the chance of them moving during assembly. Of course, whenever you're using clamps on wood, it's smart to add a board between the clamp and your project. Doing so prevents the clamps from leaving marks on your project boards.
There's a lot that goes into distressing. The paint is just one aspect. It's hard to see here, but we used distressing "tools" to ding the surface of the trunks. What you use is totally up to you. We drilled a hole through the end of a stick and threaded a piece of heavy-gauge wire through it. We then added nuts, bolts, and anything else we could think of to the wire and tied it off. We covered the whole thing with a sock and commenced beating! (For convenience, we later lost the socks.)
Note the "ring" on the trunk in the forefront of the picture. It was made by heating the top of a tin can with a blow torch and then pressing it into the wood. The sky's the limit when distressing. Let your imagination be your guide - and don't forget to ding the corners and interior!
Next, the trunks got a coat of lacquer, followed by a base coat of paint - in this case, brown. Again, there's no right or wrong answer when it comes to choosing your colors, but we recommend creating samples on scrap wood to get an idea of what the finished project will look like. It's important to make sure you use latex paint.
Make sure you’re using a solvent-based lacquer. Water-based isn’t
the best choice. Use a brush-on lacquer
and build a heavy coat. The thicker the coat, the easier it is to
blister the paint layer. In addition, glossy lacquer may work better than
a flattened product such as a satin finish.
This picture shows the "distressing" aspect as it starts to take shape. Notice the variation in color on the exterior. After the lacquer and paint dry, the surface is heated, and a paint scraper is taken to the wood. The heat causes the paint to bubble, or "blister," and facilitates scraping. You should use a heat gun that heats to at least 1,000 degrees.
The process (lacquer, paint, heat, scrape) is repeated once more before the next color is added. Don't worry if you scrape too hard or too deep. It's hard to mess up the process.
After completing the process twice, it's time to apply another coat of lacquer and the first coat of the second color. We chose green. Again, the color doesn't matter so long as it's different than the base coat.
Repeat the process (lacquer, paint, heat, scrape) one more time before moving on to the next step. If at any point you don't like the result you're getting from scraping, simply apply another coat of paint, heat, and scrape again until you're satisfied with the outcome.
Here's a picture of Ron scraping. It's a tedious process, but it's the difference in a plain trunk and a distressed one. We stained the interior of each trunk but scraped only the exterior. However, as we mentioned earlier, you want the interior to look distressed, too, so feel free to scratch, gouge, or carve on the inside of the trunk. When you stain it, the marred areas will be darker, adding an aged look. We added a "secret signature" to ours on the underside of each lid.
The final step is to apply stain. We used gel stain (aged oak), but any stain will do. Liquid stain yields a darker look, but it takes longer to dry. Staining is important for a couple of reasons. First, the painted surface will absorb some of the stain, creating an older look. Second, if there are areas that you scraped too hard, perhaps penetrating to the bare surface of the wood, the stain will adhere to that wood, adding to the distressed look. After covering the entire piece, simply wipe off the stain with a dry soft cloth. Adding a coat of polyurethane or lacquer is optional.
Hardware can be tricky, depending on the look you're trying to achieve. We weren't very successful in finding what we were looking for, but then again, necessity is the mother of invention. We bought galvanized hardware and literally baked it on the grill. That took away the shine and gave it an older look. Don't be afraid to experiment.
The final product!
We knew going into this project that we'd be giving a trunk to each of our children. With that in mind, we included a subtle mark on the top of each lid. The marks are hard to find - in fact, we're probably the only ones who know they're there - but they allowed us to keep each child in mind as we worked on (and individualized) his or her trunk.
Soon after completing (and parting with) the green trunks, we decided to undertake two more. Even after going through the process once before, we found it helpful to jot down the steps for quick reference.
Here, the rings that make up the base of one trunk are prepped for assembly. We're big fans of Gorilla Glue, which recommends dampening the surface before gluing.
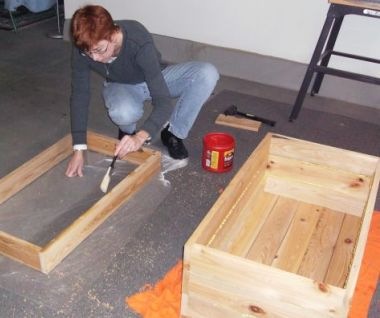
Next came assembling the lids. As noted earlier, it's important to use a scrap piece of wood between the clamp and your project to prevent scarring. Of course, when building a distressed item, it's more of a judgment call. We opted to use a buffer to prevent leaving symmetrical marks on either side of the lid.
Gorilla Glue is incredible, but it comes at a price. What you see here is pretty typical of what happens when the wood is pressed together and the glue expands. It hardens when dry but can be removed with a little effort. We used a chisel to remove the bulk of the excess, followed by sanding.
There's no point doing any serious sanding before assembly. Whether you use Gorilla Glue or wood glue, there will be excess left on the surface. For that reason, we suggest waiting to sand until the glue-up is done. A small hand plane and palm sander should do the job.
Nothing's worse than a trunk that doesn't shut evenly. For that reason, it's a good idea to make sure the surface is still flat after the lid is assembled. This is the time, before attaching the lid, to make any corrections.
The process begins again. As with the green trunks, we applied a coat of lacquer and a coat of base paint, then heated and scraped. For convenience, we went ahead and stained the interior of the trunks. We wanted them to complement the exterior and look distressed as well. Since there was no paint to scrape on the inside, we made scratches and gouges with screwdrivers and other implements before applying the stain. Again, the marred areas absorb more stain, creating an aged look.
Here, a heat gun is used to blister the first coat of paint. The heat causes the paint to bubble, making it easier to scrape. With that said, if you keep the heat source in one place very long, large chunks will come off when you start scraping. Therefore, you want to heat random areas, not spending too much time in any one spot.
Not every project goes as smoothly as you expect. In this case, we were given the wrong paint. Latex paint is recommended, but the sales clerk inadvertently mixed enamel despite our request to the contrary. The difference? You're looking at it. After extended periods of heating, the paint just wouldn't scrape off. Of course, improvisation is what makes a project fun. We applied paint thinner to create the same effect of scraping.
After applying paint thinner, we added another coat of lacquer, applied the top color of paint (which happened to be latex), heated, and scraped. Don't forget, it's important to complete each step twice.
Scraping is no fun, but it allows you to add your own personal signature to the piece. We took turns scraping.
A coat of stain is added to give the trunks an aged look and to soak into any areas of exposed wood.
After building five trunks from the floor up, we finally decided to keep one. If you're interested in trying your hand at distressing or just want to read more about it, check out Popular Woodworking's June 2007 article ("Antique Barn Finish") on the process. It's where we picked up our tips!


 Even though our goal was to build "distressed" trunks, we're both perfectionists at heart, which meant starting by planing the boards we would be using. In this case, because we were giving them as gifts, it was the right call. Of course, it's really up to you. If you want to achieve a truly rustic look, you might consider only a light sanding.
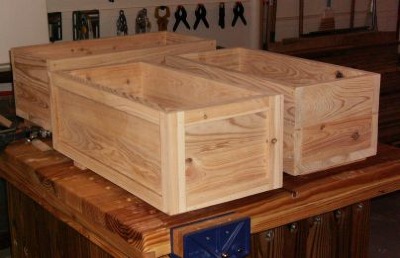 Here, the bases of the trunks have been assembled. A small hand plane
and palm sander were used to even out the surfaces. We added trim, but you don't have to. If you do decide to include trim, it's easier if you do it before attaching the lid or any hardware.
Here, the bases of the trunks have been assembled. A small hand plane
and palm sander were used to even out the surfaces. We added trim, but you don't have to. If you do decide to include trim, it's easier if you do it before attaching the lid or any hardware. 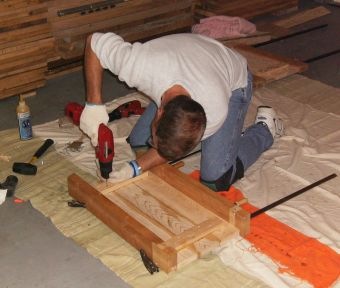 To ensure that the lids were even and completely flat, we clamped the boards together to reduce the chance of them moving during assembly. Of course, whenever you're using clamps on wood, it's smart to add a board between the clamp and your project. Doing so prevents the clamps from leaving marks on your project boards.
 There's a lot that goes into distressing. The paint is just one aspect. It's hard to see here, but we used distressing "tools" to ding the surface of the trunks. What you use is totally up to you. We drilled a hole through the end of a stick and threaded a piece of heavy-gauge wire through it. We then added nuts, bolts, and anything else we could think of to the wire and tied it off. We covered the whole thing with a sock and commenced beating! (For convenience, we later lost the socks.)
 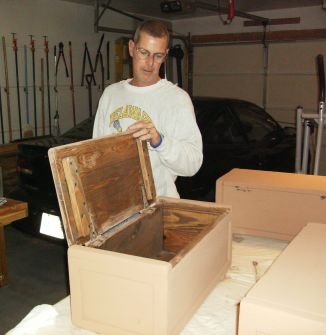 Next, the trunks got a coat of lacquer, followed by a base coat of paint - in this case, brown. Again, there's no right or wrong answer when it comes to choosing your colors, but we recommend creating samples on scrap wood to get an idea of what the finished project will look like. It's important to make sure you use latex paint.
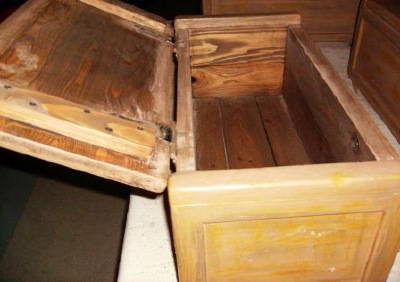 This picture shows the "distressing" aspect as it starts to take shape. Notice the variation in color on the exterior. After the lacquer and paint dry, the surface is heated, and a paint scraper is taken to the wood. The heat causes the paint to bubble, or "blister," and facilitates scraping. You should use a heat gun that heats to at least 1,000 degrees.
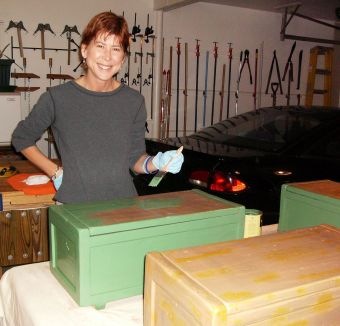 After completing the process twice, it's time to apply another coat of lacquer and the first coat of the second color. We chose green. Again, the color doesn't matter so long as it's different than the base coat.
 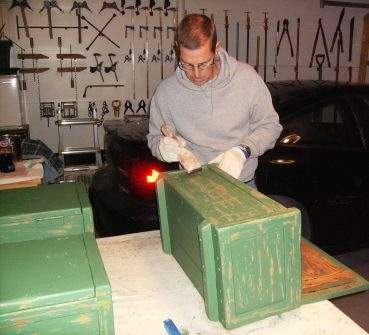 Here's a picture of Ron scraping. It's a tedious process, but it's the difference in a plain trunk and a distressed one. We stained the interior of each trunk but scraped only the exterior. However, as we mentioned earlier, you want the interior to look distressed, too, so feel free to scratch, gouge, or carve on the inside of the trunk. When you stain it, the marred areas will be darker, adding an aged look. We added a "secret signature" to ours on the underside of each lid.
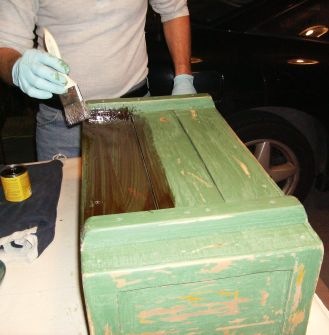 The final step is to apply stain. We used gel stain (aged oak), but any stain will do. Liquid stain yields a darker look, but it takes longer to dry. Staining is important for a couple of reasons. First, the painted surface will absorb some of the stain, creating an older look. Second, if there are areas that you scraped too hard, perhaps penetrating to the bare surface of the wood, the stain will adhere to that wood, adding to the distressed look. After covering the entire piece, simply wipe off the stain with a dry soft cloth. Adding a coat of polyurethane or lacquer is optional.
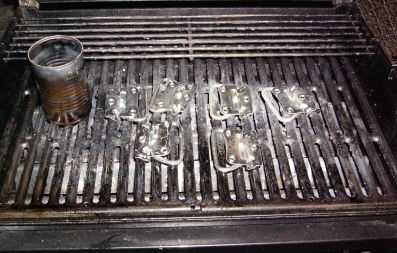 Hardware can be tricky, depending on the look you're trying to achieve. We weren't very successful in finding what we were looking for, but then again, necessity is the mother of invention. We bought galvanized hardware and literally baked it on the grill. That took away the shine and gave it an older look. Don't be afraid to experiment.
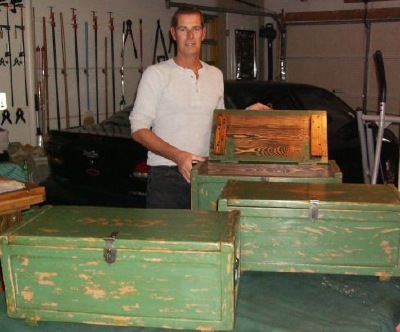 The final product!
 Soon after completing (and parting with) the green trunks, we decided to undertake two more. Even after going through the process once before, we found it helpful to jot down
 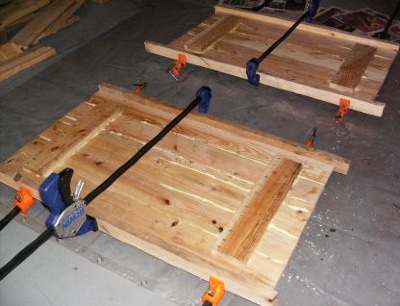 Next came assembling the lids. As noted earlier, it's important to use a scrap piece of wood between the clamp and your project to prevent scarring. Of course, when building a distressed item, it's more of a judgment call. We opted to use a buffer to prevent leaving symmetrical marks on either side of the lid.
 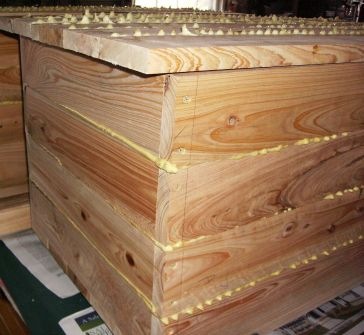 Gorilla Glue is incredible, but it comes at a price. What you see here is pretty typical of what happens when the wood is pressed together and the glue expands. It hardens when dry but can be removed with a little effort. We used a chisel to remove the bulk of the excess, followed by sanding.
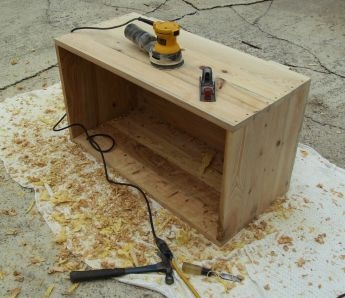 There's no point doing any serious sanding before assembly. Whether you use Gorilla Glue or wood glue, there will be excess left on the surface. For that reason, we suggest waiting to sand until the glue-up is done. A small hand plane and palm sander should do the job.
 Nothing's worse than a trunk that doesn't shut evenly. For that reason, it's a good idea to make sure the surface is still flat after the lid is assembled. This is the time, before attaching the lid, to make any corrections.
 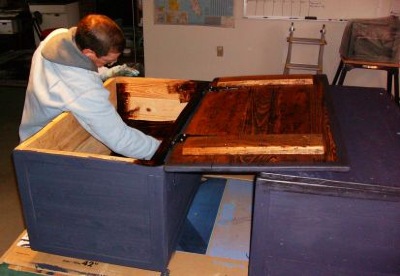 The process begins again. As with the green trunks, we applied a coat of lacquer and a coat of base paint, then heated and scraped. For convenience, we went ahead and stained the interior of the trunks. We wanted them to complement the exterior and look distressed as well. Since there was no paint to scrape on the inside, we made scratches and gouges with screwdrivers and other implements before applying the stain. Again, the marred areas absorb more stain, creating an aged look.
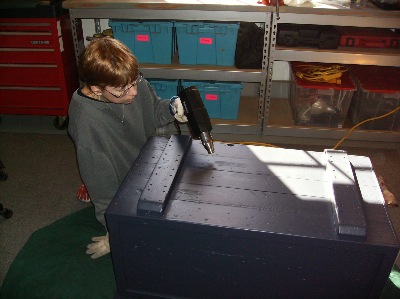 Here, a heat gun is used to blister the first coat of paint. The heat causes the paint to bubble, making it easier to scrape. With that said, if you keep the heat source in one place very long, large chunks will come off when you start scraping. Therefore, you want to heat random areas, not spending too much time in any one spot.
 Not every project goes as smoothly as you expect. In this case, we were given the wrong paint. Latex paint is recommended, but the sales clerk inadvertently mixed enamel despite our request to the contrary. The difference? You're looking at it. After extended periods of heating, the paint just wouldn't scrape off. Of course, improvisation is what makes a project fun. We applied paint thinner to create the same effect of scraping.
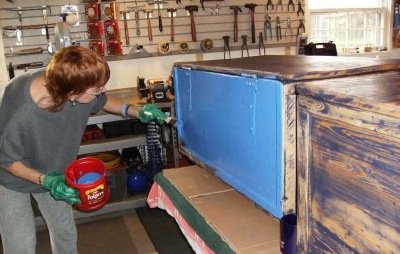 After applying paint thinner, we added another coat of lacquer, applied the top color of paint (which happened to be latex), heated, and scraped. Don't forget, it's important to complete each step twice.
 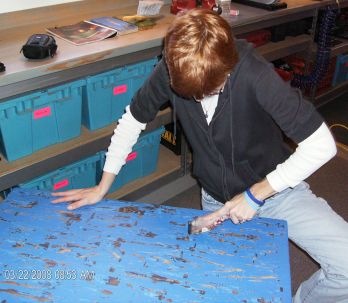 Scraping is no fun, but it allows you to add your own personal signature to the piece. We took turns scraping.
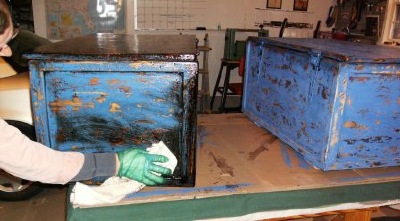 A coat of stain is added to give the trunks an aged look and to soak into any areas of exposed wood.
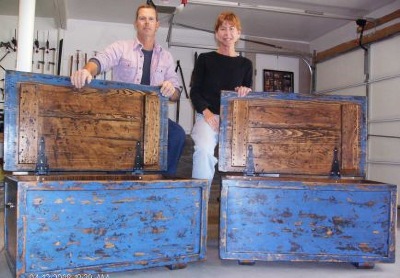 After building five trunks from the floor up, we finally decided to keep one. If you're interested in trying your hand at distressing or just want to read more about it, check out Popular Woodworking's June 2007 article ("Antique Barn Finish") on the process. It's where we picked up our tips!