We acquired a total of three spires. This one is representative of what they looked like when we got them - approximately 140 years after they were erected. Since they remained protected in a building during that time, they were in pretty good shape. There was some chipping, but for the most part, all they needed was a good cleaning and a fresh coat of paint.
Fortunately, remnants of the original paint remained, so we were able to duplicate the original color. We had to use clamps during the process to keep the painted areas from smudging. A steady hand and a little patience were the only real skills needed.
Of course, no matter how steady and patient a person is, no one is perfect. It was necessary to take a razor to the edges of the painted areas to achieve a smooth, finished look.
After the spires were painted, we had to figure out a way to display them. They were literally cut away from their original mounting when the church was renovated, leaving an inverted "V" at the bottom of each piece. The solution was small blocks cut at the opposite angle.
With the bases built and the spires attached, all that was left was a few coats of polyurethane.
This is the end result. Like so many projects, we regifted them, returning them to the family members who were gracious enough to put them in our hands in the first place.
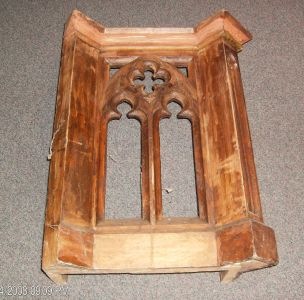
The altar needed a little more TLC than the spires did. Because there were fewer details and fewer small pieces to work around, we opted to strip it. And after a good wipe-down, that's exactly what we did.
Fortunately, the altar consisted mostly of large, flat surfaces with limited detail. While stripping wood is no fun, this project could have been much harder than it ended up being.
Here, the original wood is revealed. After wiping down the wood, we took steel wool to it to smooth the surface, then applied stain.
If you look closely at the "before" picture, you'll notice that there was very little original paint left on this piece when we got it. Lucky for us, there was some, so we had an idea of the pattern that was used. Additionally, we had the spires that originally flanked it to use as a guide.
Here it is after completion. Like the spires, they were given back to family members in Mt. Sterling, where the church still stands today.


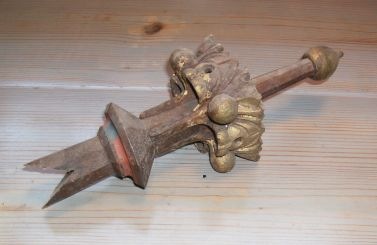 We acquired a total of three spires. This one is representative of what they looked like when we got them - approximately 140 years after they were erected. Since they remained protected in a building during that time, they were in pretty good shape. There was some chipping, but for the most part, all they needed was a good cleaning and a fresh coat of paint.
 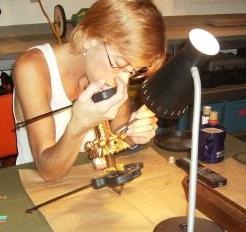 Fortunately, remnants of the original paint remained, so we were able to duplicate the original color. We had to use clamps during the process to keep the painted areas from smudging. A steady hand and a little patience were the only real skills needed.
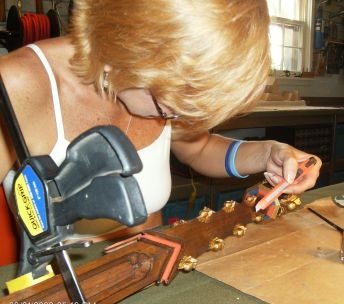 Of course, no matter how steady and patient a person is, no one is perfect. It was necessary to take a razor to the edges of the painted areas to achieve a smooth, finished look.
 After the spires were painted, we had to figure out a way to display them. They were literally cut away from their original mounting when the church was renovated, leaving an inverted "V" at the bottom of each piece. The solution was small blocks cut at the opposite angle.
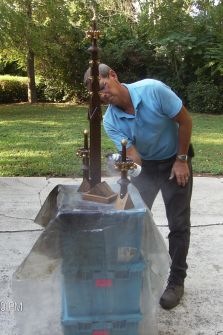 With the bases built and the spires attached, all that was left was a few coats of polyurethane.
 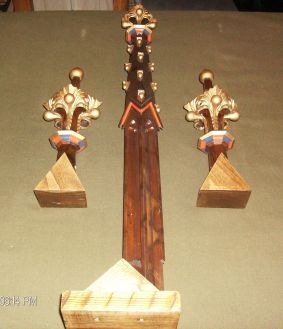 This is the end result. Like so many projects, we regifted them, returning them to the family members who were gracious enough to put them in our hands in the first place.
 The altar needed a little more TLC than the spires did. Because there were fewer details and fewer small pieces to work around, we opted to strip it. And after a good wipe-down, that's exactly what we did.
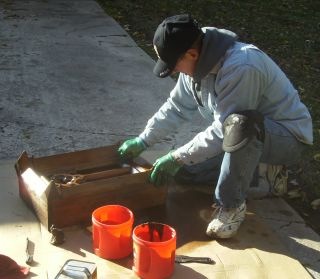 Fortunately, the altar consisted mostly of large, flat surfaces with limited detail. While stripping wood is no fun, this project could have been much harder than it ended up being.
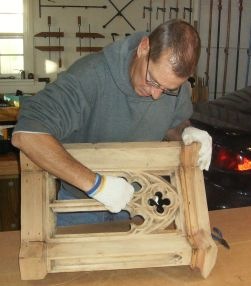 Here, the original wood is revealed. After wiping down the wood, we took steel wool to it to smooth the surface, then applied stain.
 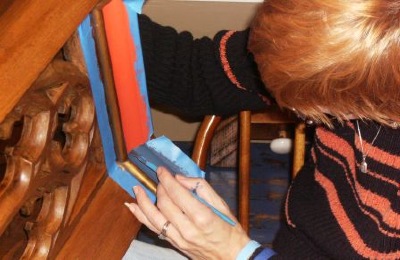 If you look closely at the "before" picture, you'll notice that there was very little original paint left on this piece when we got it. Lucky for us, there was some, so we had an idea of the pattern that was used. Additionally, we had the spires that originally flanked it to use as a guide.
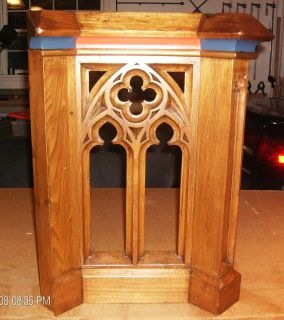 Here it is after completion. Like the spires, they were given back to family members in Mt. Sterling, where the church still stands today.