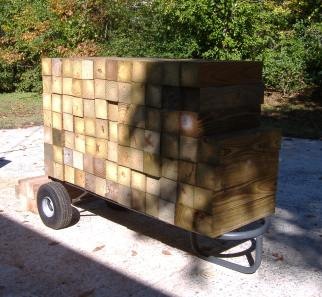
Like so many projects, the idea of building a butcher-block table came about when we found ourselves with an abundance of wood and nothing to do with it. The project started with 90 pressure-treated pine boards, all 4x4s. Four of the boards doubled as legs, extending through to the top of the table.
The first step was to plane each board to ensure a uniform fit. We could have opted not to plane the boards and created a more rustic-looking table. However, we wanted a table with a practical purpose, so cohesiveness was key. With 90 boards to plane, it was no small feat. Fortunately, the weather cooperated.
Next came boring holes in each board. Again, we wanted to ensure a snug and uniform fit. For that reason, and to better facility assembly, we inserted four threaded metal rods through each board - two on each side. (See the next picture.)
When assembling a large project, or one with multiple pieces, it's always best to perform a dry run. We loosely assembled the table, then glued everything together. After checking to make sure it was level, we tightened the nuts on the rods. We estimate the weight of the table to be around 450 pounds. With that much weight to maneuver, getting it right the first time was critical. To avoid having to move it more than necessary, the assembly (and glue-up) was done with the table upside down.
This is what it looked like after the glue-up. Not that bad really. While we're big fans of Gorilla Glue, we opted for wood glue on this project so we'd have a little extra time. We needed some leeway for tightening the threads once the glue-up was done and we were satisfied with the fit. It also made the cleanup much more manageable. Note that the threaded rods on the side that is visible have been trimmed down. It just made sense since we still had to flip the table.
While the glue was still tacky, we spread a layer of sawdust over the bottom of table. While character is everything, this allowed an opportunity to fill in any glaring imperfections. A good sanding was all that was needed to level everything out and create a smooth finish.
We love our tools, but that doesn't mean we have every tool we'd like to have. With that said, we trimmed the rods down with a Dremel. Make no mistake - it wasn't the tool of choice, but it did the job, albeit a painstakingly slow job.
The top of the table rested atop an old shower curtain liner during the glue-up. It made sense at the time. However, when we tightened the threaded rods, the wood pinched some of the plastic, drawing parts of it into the cracks. It was unexpected but not at all noticeable after a good sanding.
Some sanding and a coat of Howard's Feed and Wax were all that were needed to round out the project.
It goes without saying that we love this table. Nevertheless, we decided to build a top for it. The top has a T-track and bench-dog pegs with a vice on the end, so it's both practical and versatile. What's more, the top can be easily lifted off to reveal the butcher-block.


 Like so many projects, the idea of building a butcher-block table came about when we found ourselves with an abundance of wood and nothing to do with it. The project started with 90 pressure-treated pine boards, all 4x4s. Four of the boards doubled as legs, extending through to the top of the table.
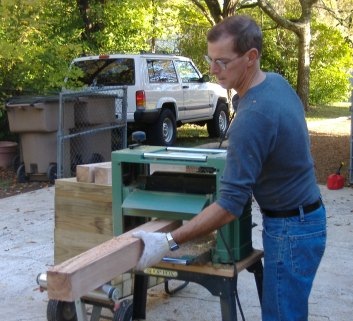 The first step was to plane each board to ensure a uniform fit. We could have opted not to plane the boards and created a more rustic-looking table. However, we wanted a table with a practical purpose, so cohesiveness was key. With 90 boards to plane, it was no small feat. Fortunately, the weather cooperated.
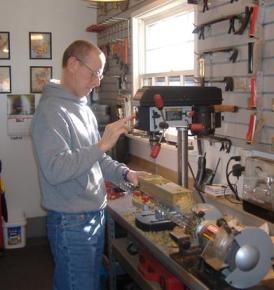 Next came boring holes in each board. Again, we wanted to ensure a snug and uniform fit. For that reason, and to better facility assembly, we inserted four threaded metal rods through each board - two on each side. (See the next picture.)
 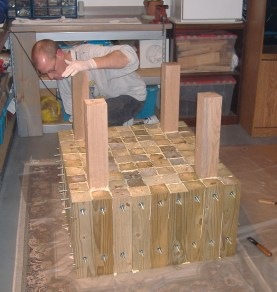 When assembling a large project, or one with multiple pieces, it's always best to perform a dry run. We loosely assembled the table, then glued everything together. After checking to make sure it was level, we tightened the nuts on the rods. We estimate the weight of the table to be around 450 pounds. With that much weight to maneuver, getting it right the first time was critical. To avoid having to move it more than necessary, the assembly (and glue-up) was done with the table upside down.
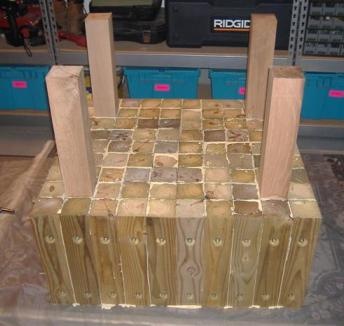 This is what it looked like after the glue-up. Not that bad really. While we're big fans of Gorilla Glue, we opted for wood glue on this project so we'd have a little extra time. We needed some leeway for tightening the threads once the glue-up was done and we were satisfied with the fit. It also made the cleanup much more manageable. Note that the threaded rods on the side that is visible have been trimmed down. It just made sense since we still had to flip the table.
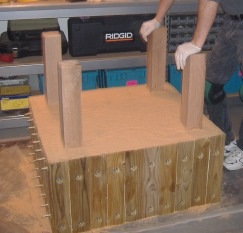 While the glue was still tacky, we spread a layer of sawdust over the bottom of table. While character is everything, this allowed an opportunity to fill in any glaring imperfections. A good sanding was all that was needed to level everything out and create a smooth finish.
  We love our tools, but that doesn't mean we have every tool we'd like to have. With that said, we trimmed the rods down with a Dremel. Make no mistake - it wasn't the tool of choice, but it did the job, albeit a painstakingly slow job.
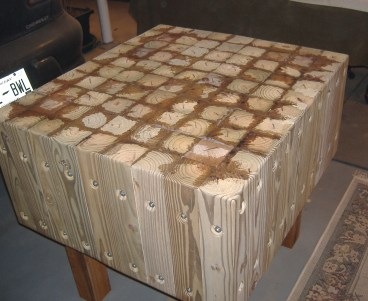 The top of the table rested atop an old shower curtain liner during the glue-up. It made sense at the time. However, when we tightened the threaded rods, the wood pinched some of the plastic, drawing parts of it into the cracks. It was unexpected but not at all noticeable after a good sanding.
 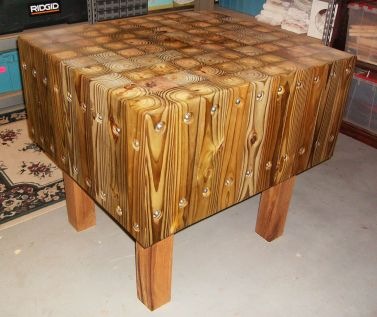 Some sanding and a coat of Howard's Feed and Wax were all that were needed to round out the project.
 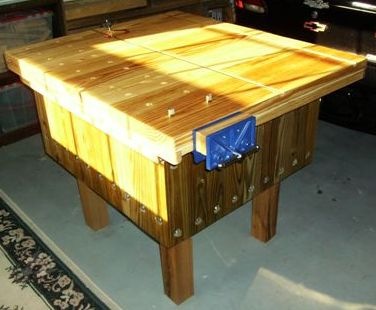 It goes without saying that we love this table. Nevertheless, we decided to build a top for it. The top has a T-track and bench-dog pegs with a vice on the end, so it's both practical and versatile. What's more, the top can be easily lifted off to reveal the butcher-block.