The beautiful thing about building an industrial cart is there are no rules. They come in all shapes and sizes. We started by arranging the wood and building the frame. Just for fun, we built two.
Our carts are made of cypress. The boards had been sitting in a lumber yard for some time. The weather had gotten to them, and they were no longer able to be sold. Some of the boards had begun to rot, others were warped - all things that created the character we were looking for.
The boards we used were in rough shape, which is great for character but not so great for practical use. We used a rasp and hand plane to smooth out some of the areas that were severely splintered. Since we planned to use the finished product as a coffee table, we also had to smooth out sections of the top to create a more level surface
If you're not sure which color to use, it's always a good idea to create sample boards. It's important to use the same type of wood you're using for your project. And don't forget to create some end-grain samples. The end grain soaks up more stain and will appear darker than stain applied with the grain.
Once the carts had a coat of stain, we proceeded to stencil the sides. We tried different colors on sample boards before settling on red. It was important to us that the carts have a rustic, industrial look to them. For that reason, we used a sponge to apply the paint, which resulted in the letters being spotty (as opposed to completely solid). When they were dry, we did some light sanding, creating an aged look.
Here, Ron affixes metal strapping to the top of one cart. Again, the beauty of building an industrial cart is that you can embellish it any way you want. We considered a number of options before deciding on the straps. They're used to band steel product and had been discarded as trash. He affixed them with ten-penny nails and used a sheet-metal crimper to bend them around the ends.
Poly! Poly! Poly! If you don't know by now, we're huge fans of polyurethane - especially when it comes to finishing furniture. We left a lot of texture on the wood. For that reason, the poly served two purposes. First, multiple coats created a smoothness to the surface while allowing us to retain a rustic look. Second, polyurethane helps seal the wood, preventing moisture from getting in and causing additional rot. The carts got five coats each. To create a smooth finish, we hand-rubbed the surface with super-fine steel wool after the final coat.
The finished product. It's worth noting that one of the reasons we put off building these carts was the wheels. We wanted to use wheels that were more period-appropriate but just couldn't find what we were looking for. We settled on wheels from the hardware store. Needless to say, we're still on the lookout for the perfect wheels, and when we find them . . . look out!
Update:Two years later, in 2012, we found the wheels. Click here to check them out!


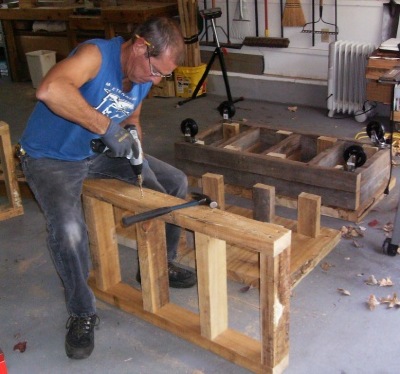 The beautiful thing about building an industrial cart is there are no rules. They come in all shapes and sizes. We started by arranging the wood and building the frame. Just for fun, we built two.
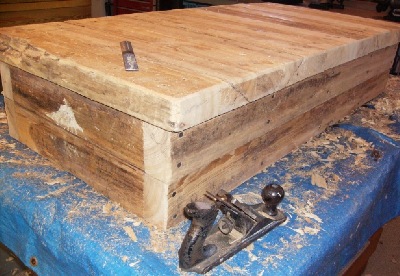 The boards we used were in rough shape, which is great for character but not so great for practical use. We used a rasp and hand plane to smooth out some of the areas that were severely splintered. Since we planned to use the finished product as a coffee table, we also had to smooth out sections of the top to create a more level surface
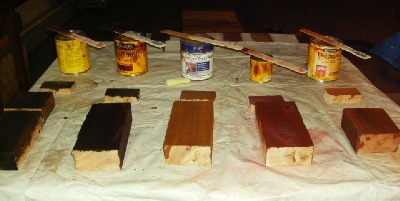 If you're not sure which color to use, it's always a good idea to create sample boards. It's important to use the same type of wood you're using for your project. And don't forget to create some end-grain samples. The end grain soaks up more stain and will appear darker than stain applied with the grain.
 Once the carts had a coat of stain, we proceeded to stencil the sides. We tried different colors on sample boards before settling on red. It was important to us that the carts have a rustic, industrial look to them. For that reason, we used a sponge to apply the paint, which resulted in the letters being spotty (as opposed to completely solid). When they were dry, we did some light sanding, creating an aged look.
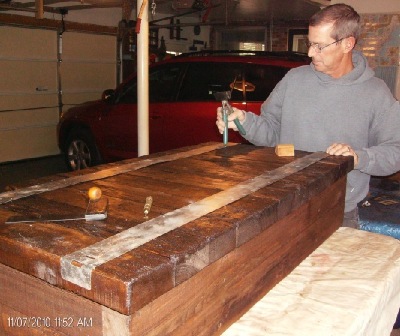 Here, Ron affixes metal strapping to the top of one cart. Again, the beauty of building an industrial cart is that you can embellish it any way you want. We considered a number of options before deciding on the straps. They're used to band steel product and had been discarded as trash. He affixed them with ten-penny nails and used a sheet-metal crimper to bend them around the ends.
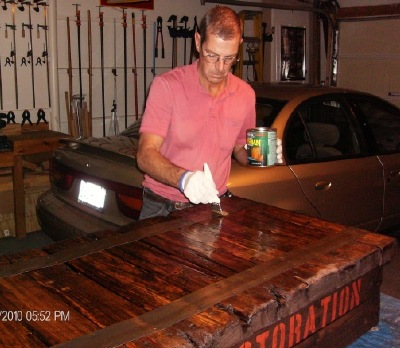 Poly! Poly! Poly! If you don't know by now, we're huge fans of polyurethane - especially when it comes to finishing furniture. We left a lot of texture on the wood. For that reason, the poly served two purposes. First, multiple coats created a smoothness to the surface while allowing us to retain a rustic look. Second, polyurethane helps seal the wood, preventing moisture from getting in and causing additional rot. The carts got five coats each. To create a smooth finish, we hand-rubbed the surface with super-fine steel wool after the final coat.
 The finished product. It's worth noting that one of the reasons we put off building these carts was the wheels. We wanted to use wheels that were more period-appropriate but just couldn't find what we were looking for. We settled on wheels from the hardware store. Needless to say, we're still on the lookout for the perfect wheels, and when we find them . . . look out!